10.27.2010

Wrapping It Up

This week I stayed motivated to continue putting the garden and yard to sleep for the year.  I planted garlic and further trained my espalier apple trees on Monday.  I was inspired by the espalier apple trees I saw at the Chicago Botanic Garden a few years ago.  The next season, I planted two dwarf apple varieties along our north fence; the second season they produced a good amount of fruit.  This year there wasn't any, probably because I pruned them vigorously last spring.  Our neighbor, who guides my trimming activities, showed me a couple of tricks to help train the flexible young branches.  One is to clip a clothespin to the skinny trunk just above and parallel to a branch you want to bend so that it pushes it downward.  That technique worked very well.  This week I pursued the second technique of hanging a weight on the end of the branch to pull it down.  After this season there were many vertical branches I would have liked to clip off, but I've learned that spring is the best time to prune because the trees are least disease-prone.  So for now I trained the new growth.  We'll see what we need to prune in the spring (Am I thinking of next season already? You bet!)  I also began breaking down my pole bean trellis and pulling dead stems off of perennials.  I haven't touched a rake yet, but plan to this weekend.  Otherwise it wouldn't be the first time I miss the city's leaf collection.  I do try to keep as many leaves as possible on our property to use as winter mulch, but our compost bin can't hold the rest.

Yellow Plastic "Lame"
This week I also spent a good amount of time in the kitchen baking and cooking.  Ah, it feels great to have more time to do this now that my classes have wound down.  I baked my new favorite bread that I mentioned previously.  To score the top I use a tool that was given to me by the first pastry chef with whom I worked, Mary Lou Simmelink (and also the person who inspired me to take up knitting).  I just learned that it's called a lame.   It's not necessary, but very handy for slashing or docking.

After harvesting all my beets on Sunday I had a lot of beet greens with which to contend.  I never like to waste them, but blanching and freezing them all can be tedious and sometimes I don't feel I can even use them all before the next season.  So Monday I found a way to use a lot (like a pound) of them very quickly.  I served this with vegetable crudites and my freshly baked bread as a sort of "nosh plate" dinner, which we occasionally do--it makes for a nice communal meal.  I used golden beet greens which imparted a beautiful yellow cast to the dish--almost looked like I'd added curry, or at least turmeric.  And I didn't have bacon on hand though I had a container of bacon fat--a staple in the back of our fridge, it can always be found snuggled up next to the everlasting container of hog casings (sausage-making season is upon us.)  

Creamy Beet Green Dip
Makes 12-14 1/4-cup servings

I adapted this recipe from one that called for collard greens.  You could really use any leafy greens from spinach to kale.  

2 slices bacon (can sub./add finely diced, skinned bratwurst)
Bacon fat (if not using bacon)
1 small onion, chopped (about 1 c.)
1 medium red bell pepper, seeded and chopped (3/4 c.)
1 lb. fresh beet greens/other greens, washed, stems removed, chopped in a food processor (or by hand)
3 cloves garlic, minced
1 8-oz. pkg. cream cheese, cubed and softened (can sub. 1/2 the amount with plain whole milk yogurt)
2 oz. shredded cheese (about 1/2 c.)--Monterey Jack, cheddar, gouda, etc.
1/2 c. sour cream
1/2 t. Cajun seasoning (optional)--if you don't use this, add 1/4 t. salt
Breadsticks, vegetable crudites, fresh bread, crostini for dipping

Preheat oven to 350 degrees. In a 12-inch skillet cook bacon until crisp.  Drain bacon on paper towel.  Remove and discard all but 2 t. bacon drippings from skillet.  Add onion and peppers to skillet.  Cook 5 min. over medium heat or until vegetables are just tender, stirring occasionally.  Add greens and garlic; cover and cook 10 min. or until tender, stirring occasionally.  Remove from heat.  Add cream cheese, shredded cheese, sour cream, and Cajun seasoning (or salt) to greens mixture, stirring until combined. Crumble bacon and add to greens mixture (or add bratwurst, if subbing.)  Spread mixture in a 1 1/2-qt. casserole dish or 9-inch pie plate.  Bake, uncovered, 10 min. or until warmed through.  Serve with vegetable dippers or bread(sticks).

Free Pears!
Yesterday I was driving through Mequon after an appointment and saw a sign on someone's lawn that said "Free Pears" so, of course, I couldn't resist stopping.  My first thought was that we would use them for our next round of Community Pie pie baking.  Our group had a meeting this week and decided we still needed to seek out pumpkins and pears that would go unused around the city (we have plenty of apples.)  So I filled two canvas bags with windfall pears (and I mean WINDFALL--with the heavy winds this week, they were coming down as I crawled around under tree) to total over 25 lbs. of fruit.  I saved a few of the scratch and dent pears for myself and tonight I prepared a salad with romaine and spinach from today's CSA box, toasted walnuts, shaved Asiago cheese, and an apple garlic vinaigrette--a combo created a la minute from two leftover preserving mediums.  The pears were delicious (and so free!)

Vintage Martin-family fabrics
In case you've wondered if the life of an urban homesteading ever gets boring, it doesn't.  At least not in my book, but then again I'm not easily bored.  I received a special delivery yesterday from Ben's Aunt Martha in Bradford, PA (home of the Zippo lighter).  She'd eagerly passed along a box of fabric from her mother (Ben's late grandmother, Georgia). Knowing I loved to sew and that she wouldn't use the remnants anytime soon, she shipped them west.  There's a variety of colors, patterns, and textures including a couple polyesters straight out of the 60s or 70s.  Ben said "that's how I remember my grandma, in polyester," so this gift was a treat for us both.  I added them to my fabric cabinet today and plan to put them to use this winter as I start new projects.

This weekend my mom will be in town as Ben heads out for the annual "Fall Classic," dudes canoe trip on the Wisconsin River.  Maybe Grammy can help me persuade Vera that being a gnome for a night is a fun idea.  We'll let you know how it goes.

10.24.2010

Harvest Time


Rattlesnake Pole Beans
Lincoln Leeks
Golden Beets
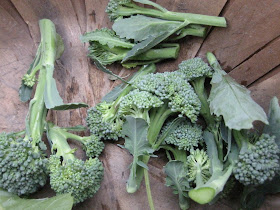
I decided this past week that although we've had beautiful, fairly warm weather for this time of year, I have to start wrapping things up around the garden or I'll be frantically trying to squeeze it all into a weekend in the next month.  I picked the rest of the Rattlesnake pole beans from the trellis, shelling the already dry ones and leaving the rest to dry completely in a sunny window.  Today I harvested all the leeks and mature red and golden beets (another succession of beets is still in the ground.)  When I show people my garden they always ask how I find the time to manage it all season; "how much time do you spend every day?" is a common question.  To be honest, on an average day during the growing season I don't spend more than 30 minutes actually "working" in the garden.  I weed early and often, harvest little baskets of vegetables here and there depending on what I need for cooking (or more if I'm preserving), and plant successions in small spurts.  But this time of year, harvest time, I definitely spend more time in the garden and yard.  Harvesting vegetables then cleaning and weighing them took about an hour and a half this afternoon.  This week I'll probably spend another couple of hours, at least, planting garlic, Egyptian walking onions, raking, and putting away trellises and pots.  This was the first year I grew leeks and I was extremely pleased with the yield.  They weren't the most robust leeks I've seen, but they produced well enough to provide all the leeks we'll need all winter.  I enjoyed watching these perky little green stalks share a bed with my kohlrabi and now fall beets and radishes.  In fact, I already miss seeing them in the raised bed.  My mind often wanders when I'm left to a menial or repetitive task so as I was cleaning and trimming these alliums--snipping the root hairs about a 1/2-inch below the base--I was somehow reminded of the successful, but short-lived dog grooming business my mom and I had when I was a kid (our regular groomer, a local clown--think manicured show poodles--skipped town after her messy divorce from a fellow clown.  We were out of a qualified trimmer so we proactively picked up our own clippers...but I digress.)  I also harvested more side shoots of broccoli today.  It's the first year I've grown broccoli and I've been so impressed with its production.  Since harvesting the main heads, the side shoots have been crazily producing many more individual florets.  There's nothing like having fresh, crisp broccoli to use right from the garden.  My favorite way to use it is in an egg dish like quiche or an omelet.
Broccoli Florets
I thought I was done preserving for the season, but on Friday I acquired a grocery bag of red bell peppers from our farmers at Pinehold Gardens.  According to them I underestimated the time it would take me to write recipes for their CSA newsletter this season so they've been generously giving me surplus vegetables.  I think it's a great barter.  I julienned and froze half of the peppers, but chose to roast and can the rest.  I prefer to roast them directly over the flame of my gas stove.  It helps to ventilate the kitchen if you choose this method.  The charred skin you'll peel off is a great carbon source for your compost.  I must say I've been most excited about this preserving projects.  Hopefully these will be better than the slimy store-bought things Ben's been so turned off by in the past.

Roasted Red Peppers with Lemon Juice
Makes about 3 pint jars


Adapted from Canning for a New Generation by Liana Krissoff.  Anyone who's taken my preserving classes has heard me say that it's not safe to can something in oil and expect it to be shelf-stable.  In this case, because there is plenty of added acid (lemon juice and vinegar), it's a safe recipe.  But if you choose to make a straight herb-infused oil, you must refrigerate it.


Flame-roasted Red Peppers
4 lbs. red peppers (about 10)
1 c. bottled lemon juice
2 c. white wine vinegar (6% acidity)
1 c. extra-virgin olive oil
2 cloves garlic, sliced
2 t. pure kosher salt

Roast peppers directly on a gas burner or under the broiler until blistered all over, turning them frequently with tongs.  Place in a sealed plastic bag or covered bowl and let steam at least 10 min.  Peel and seed the peppers, rip or cut them into large sections or strips.

Canned Roasted Red Peppers
In a wide 6- to 8-quart pan, combine the lemon juice, vinegar, oil, garlic, and salt.  Bring just to a boil.  Prepare canning jars and lids.  Heat water in canning kettle.  Heat jars if not already hot.  Pack roasted peppers into jars and ladle in hot liquid, leaving 1/2-inch headspace at top.  Remove air bubbles; wipe rim with damp paper towel.  Place lids and rings on jars.  Tighten lids until they are just fingertight.  Load kettle jar rack, submerge, making sure the water is covering the jar--ideally by 1-inch.  Bring to a boil, process for 15 min.  Remove jars to folded towel on countertop and let cool completely.  After 1 hour, check that lids have sealed.  Label and store.

I spent most of today in the kitchen preserving, baking, and cooking.  I love days like this when I have the energy.  Tonight was the Packers v. Vikings game so I decided to make a big pot of chili for game time.  I'm one of those people who loves pro football (especially Superbowl) strictly for the food aspect--everyone wants something to nibble while they're keeping score.  Otherwise, I couldn't care any less about football.  This was a chili recipe I prepared for the last Superbowl, but I used shredded pork for that batch instead of chicken.  It's delicious either way.

Three-Bean Chicken Chili
Serves 6

Adapted from Martha Stewart Living magazine.  I used some of our dried rattlesnake beans along with black and fava beans for a variety of texture.  It was a pleasure to go outside and cut fresh cilantro from the garden this time of year.  It's still going strong.


Rattlesnake, Black, and Fava Beans
1 T. coconut or grapeseed oil
2 medium onions, finely chopped (about 3 c.)
5 garlic cloves, minced
1 green bell pepper or poblano pepper, chopped
2 boneless, skinless chicken breasts (about 1 3/4 lbs.)
3 t. ground cumin
2 t. chili powder
1 t. dried oregano
1 dried bay leaf
16 oz. mild salsa (home-canned or store-bought)
1/2 c. diced green chilies
3 1/2-4 c. chicken or vegetable stock
1/2 t. salt
4 c. cooked beans, drained and rinsed
freshly ground black pepper
2 oz. sour cream for garnish (optional)
Shredded cheese, for garnish (optional)
Fresh cilantro leaves, for garnish (optional)

Finished Chili
Heat oil in large stockpot and saute onions, garlic, and peppers, stirring occasionally, until soft, about 10 min.  Raise heat to medium, and add chicken, cumin, chili powder, oregano, and bay leaf.  Cook, stirring frequently, until chicken is seared on outside and coated thoroughly with spices, about 10 min.  Add salsa and green chilies, and stir to combine.  Cook 5 min.  Add stock, salt, and beans; season with black pepper, stir to combine.  Cover; simmer.  Stir contents, then replace lid to partially cover pot.  Reduce heat to medium-low, and cook until chili is thickened and chicken is tender, stirring occasionally, about 1 1/2 hours.  Divide among bowls; garnish as desired.  Serve immediately.

Many people have been asking me what to do with all that winter squash coming in lately.  Last night I made more of my Chili-Carrot-Tomatillo Soup, but substituted carnival squash for the carrots.  It purees into a beautifully creamy soup and is great with a dollop of plain yogurt.

This weekend I finally picked up my knitting again.  It feels so great!  I'm currently finishing a short-sleeved cardigan for myself.  I started this last spring and stopped just as I was starting the first sleeve.  When I picked it up again Friday night, it took me the whole night to figure out where I'd left off in the pattern.  Whew!  Nothing like a good mental challenge to start the knitting season.  I also started an easy pullover sweater for Vera last night.  My friend Beth who blogs at At the End of This Row inspired me with her one-year vow to not buy any new yarn.  All of her projects since then have been classified as "stash busters."  I love that concept and have decided to try it myself--not that I buy a lot of new yarn to begin with (I'll share my secrets in a later post), but I do have a hutch full of odd skeins in my basement craft corner.  I can't wait to get to the bottom of it and see how many projects I can create.  I'm guessing that most of them will be for Vera since garments her size don't require much yarn.  One last project I had started last spring was a purl-stitch cardigan for Vera.  I was getting frustrated with it back in April because the pattern was missing a step or two--not the first time I've come across badly written knitting patterns (almost as annoying as badly written cookbooks.)  Instead of seeking out a local knitter to help me sort through the book's mistake, I've decided to abandon the project and disassemble it.  In coming to this conclusion, I was reminded of my sister's dedication to baking.  She'll call and leave a message on a night I'm teaching a class, I don't get it until 10 PM--too late to return her call in a later time zone--so I call her in the AM to find out she'd wondered about substituting an ingredient in a baking recipe, but she was already halfway through the recipe so decided to throw out the whole cake.  Sounds like she missed the memo on "mise en place," though I'm realizing I should put everything in place before beginning a craft project as well.

Entrance to the LUH backyard garden
Vera and I were out for our daily walk one day last week, loving all the fall colors.  I realized that the gods must erase our memories of the beauty of years past because each year it's like I've forgotten just how amazing and glorious each season can be.  I'm loving the purple of the New England Aster juxtaposed with the red of the Staghorn Sumac leaves all against the backdrop of the trees' oranges and golds.  Gorgeous!  I'll enjoy it as long as I can.

10.19.2010

"Oh Gnome You Di-in't!"

Accessories to Vera's Gnome Costume
I've officially entered the stage of creating homemade Halloween costumes.  And let me tell you, I could hardly wait.  I grew up with my mom making many costumes from an angel and bumble bee to Lady Liberty and a clown (which my brother and I actually shared, attending alternating Halloween parties.)  Last year we didn't Trick or Treat, but Vera wore the standard infant pumpkin costume that was given to us by a friend.  We stopped at a couple friends' houses then took her out to dinner.  This year we may try to pull her in the wagon and see how much fun she has climbing the stairs to each front door, granted she doesn't get trampled by the herds of kids that swarm our square block in Bay View, which is known as the Gold Coast for candy.  Vera's L.A. cousins, Ryan and Quinn, eyed this costume idea many months ago and Ben and I thought we'd go for it because it's really quite appropriate for our setting.  We'll attempt to dress her as a Garden Gnome.  I use the word "attempt" because so far she wants nothing to do with the beard, though she's giddy about the cone-shaped hat.  This is one reason I'm not spending a boatload on the costume, she may only wear it for a photo-op.  I found a pair of brown pants and a blue turtleneck at the thrift store.  I'm shortening a thrifted patent leather belt with a big buckle that matches her black patent leather shoes.  And I made the beard and hat out of supplies I had readily available in my fabric cabinet and craft stash.  Now if can just get her to sit long enough in the garden, it might actually work.  Ha!


Last night was the last of my cooking classes for 2010.  In a way, it felt like the last day of school afterwards.  It was a jam-packed season of preserving and vegetarian cooking classes, but in most ways, it was worth it.  Now I can exhale.  I have about three months until my next class, followed by some introductory preserving classes this winter as well as planning for next season's preservation series.  So begins my "summer vacation."  If I had to write a report on "What I Plan to Do on My Summer Vacation," which will actually be my winter vacation, it would include tackling multiple knitting projects; organizing files, closets, and pantries; planning my 2011 garden; baking; cooking; and reading as well as visiting with friends, having Sunday dinners, and RELAXING--a coveted idea in my current life.  Of course Vera will be hanging out on this winter vacation with me and we plan to get outside every day whether it's in the winter stroller, on the sled, or playing in the snow; go to library story hour and playgroups, and get crafty--when can a young child be introduced to glue and safety scissors (as you can tell, I'm eager to get her crafting as well.)

Ben's leaf, circa 2000
As the warm season truly draws to a close, I'm realizing that I may need to mostly or partially bring my clothesline inside.  Friends have told me I can dry clothes outside all year, but I anticipate having to at least use the dryer for finishing them.  With this cold, moist air by the lake I can't see things getting 100% dry out there all winter, though for our electric bill's sake I wish they could.  (The solar panels can't come soon enough.)  So I was outside yesterday morning--one of my weekly laundry days--before dawn (with the exterior garage and house lamps spotlighting my work) and it was so peaceful.  The only sound was the rustling of trees in the wind.  Ah!  That sigh is the feeling I want to maintain as I slowdown and relax this winter (which is NOT here yet!)

10.17.2010

Here, There, and Everywhere

Salsa Party Setup
I felt like we were all over the place this weekend.  It was another whirlwind Friday through Sunday, but fun was had by all.  Friday night I put on my first preserving party.  A good friend had some other friends and co-workers interested in learning how to preserve so months ago we began organizing a salsa party.  She prepared a festive taco bar along with a pot of spicy tortilla soup, played Latin music, but stopped just short of running "La Bamba" on a loop on the basement television.  While the guests mingled, ate, drank, and made merry, I turned it on in the kitchen preparing salsa then demonstrating to the guests how to can it.  Everyone got to take home two jars of salsa as well as some other lovely parting gifts of Jane's choosing.  I don't know about all of them, but I had a blast!  I feel like many of the guests took home some new skills--or at least they now have a desire to try canning for themselves.  To be honest, I'd been a bit nervous about teaching food preservation to a group that had been imbibing, but I made sure to (mostly) abstain myself so that at least one person was guaranteeing the salsa's safety.  Perhaps in the future I can host bridal canning showers (give the gift of domestic skills) or more weekend preserving parties.

Spanish Eclectic Cottage
Saturday we drove down to Glen Ellyn, IL (western suburbs of Chicago) to visit Ben's parents.  And speaking of preservation, we went on the annual Historic Home Tour put on by the Citizens for Glen Ellyn Preservation.  We made it to four of the six homes/buildings on the tour.  I've always been taken by this kind of activity.  Ben says it's because I'm nosy about how people live, which is completely false (though I probably should have been an anthropology major).  What I really enjoy is seeing how people decorate they're homes and getting ideas for our own.  And ever since my "Living Environments" class in high school, I can easily geek out when discussing architectural features like clipped gables, rafter tails, and corbels.  We toured two gorgeous Arts and Crafts homes, which both had cozy nooks and smaller rooms that made me want to curl up then and there with a book or some good music.  We also toured a Prairie Style home as well as a "tiny" Spanish eclectic cottage--more elaborately decorated than my taste, but absolutely stunning.  I gathered lots of new ideas, especially for remodeling our own kitchen soon.

That night we got a sitter for Vera and drove into Chicago with Ben's parents for dinner at the Atwood Cafe on the ground floor of the Burnham Hotel.  We enjoyed a delicious local, seasonal menu then headed over to the Goodman Theatre to see a musical version of Candide by Voltaire.  We found this French satire, written in the mid 18th century, to be timeless.  Following all the unhappiness, hatred, and dishonesty in the world, it concluded with the central couple moving to a farm and growing vegetables--something hopeful for the future in this crazy world.  What a coincidence that we should see a performance like this.  Reminds me that we're doing the right thing in building our urban homestead.  Hopefully we too are building hope for the future.

10.14.2010

Soup's On!

It's been a bit chilly, at least in the mornings, this week.  That, coupled with the fact that our fridge is overflowing with veggies from our garden and CSA box, made it feel like the right time to make soup.  I made two big pots tonight--Turnip and Turnip Greens Soup for dinner and Creamy Chile-Carrot-Tomatillo Soup to take to Ben's parents' house on Saturday.  I always try to make large batches of soup so that we can freeze the leftovers as our local "convenience" food.  This has saved us from spending money on takeout on many busy evenings when there was no time to cook.

Cream of Chile-Carrot-Tomatillo Soup
Creamy Carrot Soup, Turnip & Turnip Greens Soup
Serves 6

This is a recipe I developed for our CSA farm newsletter.


2 T. butter
1 medium onion, chopped
2 large shallots, chopped
1 red bell pepper, seeded and chopped
1 hot pepper, seeded and chopped
3 tomatillos, husks removed, and chopped
6 large carrots, peeled and chopped
4 c. vegetable stock
1 corn tortillas, broken into small pieces
1/4 c. lime juice
1/2 c. to 1 c. heavy cream or half and half (depending on desired consistency)
salt, to taste

Melt butter in saucepan over medium heat and saute the onions and shallots until transparent.  Add peppers, tomatillos, and carrots; cook until soft.  Add stock and corn tortilla.  Bring to a boil then turn down the heat and cook 5-6 min.  Transfer to blender and blend until smooth, in batches, if needed.  Return to heat and add lime juice, cream, and salt to taste.  Heat through and serve.

Whole Wheat French Boule
Of course there's nothing like hot soup with a hearty bread.  I may have finally found an accessible bread recipe.  I've longed to bake homemade bread on a regular basis, but haven't found a recipe that was reasonable enough for everyday or at least bi-weekly preparation.  Today I stumbled upon a recipe for French Bread in Beth Hensperger's The Bread Bible for which the dough is made in the food processor.  I substituted stoneground wheat flour for the bread flour it called for and after very little kneading and a couple rounds of proofing it baked up soft inside with a nice crusty outside.  I think it's better than the Artisan Bread in Five Minutes a Day method, which I personally found to be messy.

This week I  had a craving for Sloppy Joe's.  I substituted local ground bison and added some more green veggies to pump up the nutrient content for Vera's sake (I'm telling you, I'm willing to sneak veggies in anywhere!)  She loved it.

Bison Sloppy Joe's with Raw Green Veggies
Sloppy Joe's from Scratch
Serves 4

1 lb. ground pastured beef, bison, or venison
1/4 c. chopped onion
1/4 c. chopped green bell pepper

1 celery stalk
3 mustard green leaves
1 scallion, chopped
1/2 t. garlic powder

1 t. prepared yellow mustard
3/4 c. ketchup
3 t. brown sugar
salt and pepper to taste

In a medium skillet over medium heat, brown the ground meat, onion, pepper, drain off any liquid (though it will mostly like be very lean.)  While the meat is cooking, chop the celery, mustards, and scallions in the food processor.  Stir into cooked meat.  Stir in the garlic powder, mustard, ketchup, and brown sugar; mix thoroughly.  Reduce heat and simmer for 10 min.  Season with salt and pepper.

This week actually found Ben cooking dinner one night.  After recent lamenting that summer had come and gone so quickly he commented that he hadn't even gotten to make his Eggplant Parmesan, one of the few dishes in humble repertoire.  I harvested our last two eggplant early this week so I asked him to make the evening meal last night.  He happily agreed to the plan and made the most delicious Eggplant Parmesan I've had.  Vera went to bed early so the two of us savored a nice quiet dinner alone with some wine.  It's amazing how the little things are such a big deal since we've become parents.

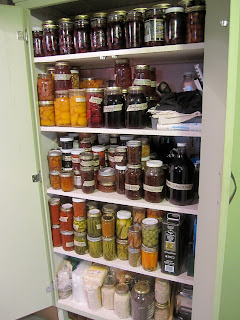
I believe I have finally finished stocking my pantry for the season.  I preserved dill green tomatoes and pickled kohlrabi on Tuesday.  That's about all the space I have for now.  We should be good to get through the biggest Wisconsin snowstorm we can imagine.

Dill Green Tomatoes (look like green olives!)


I have one last recipe before I close this post.  I discovered a vintage (circa 1987) cookbook at the thrift store last week.  Smart Muffins by Jane Kinderlehrer is packed with tons of recipes for all kinds of muffins, which I love to make as a breakfast option as well as easy snacks for Vera.

Banana Muffins with Hazelnut Topping
Makes about 10 muffins
I added fresh mint that I had picked and on hand in the fridge.  I also substituted 2 T. okara (by-product of making soy-milk) for the eggs.  These muffins are packed with goodness and they're not too sweet like a lot of "muffins" you can buy these days, which I think of as more like cupcakes.  


2 large eggs
2 bananas (about 3/4 c.)
1/4 c. fresh mint
3 T. honey
2 T. olive oil or vegetable oil
1/2 c. yogurt, buttermilk, or soured milk
1 1/4 c. sifted whole wheat pastry flour
2 T. oat bran
2 T. wheat germ
2 T. wheat bran
1/2 t. ground cinnamon
1 t. baking powder
1 t. baking soda
Chopped hazelnuts


In a food processor, blend together eggs, bananas, mint, honey, oil, and yogurt/buttermilk/soured milk.  In another bowl, combine pastry flour, oat bran, wheat germ, wheat bran, cinnamon, baking powder, baking soda.  Preheat oven to 400 degrees.  Grease muffin pan or line with paper baking cups. Combine the dry ingredients with banana mixture and mix briefly, only until no flour is visible.  Spoon batter into muffin cups.  Top each muffin with chopped hazelnuts.  Bake 20 min. or until tops are golden.  Cool 5 min., then remove to wire rack to fully cool.  Enjoy with butter or cream cheese flavored with your own preserves, roasted/pureed squash/pumpkin, or other fruits.


10.10.2010

Fall Preserving

Nasturtium seed pods
This time of the season I start checking off the last of my preserving list, sometimes frantically as the weather can be unpredictable and I'm working to pick and put up what I can before I lose it.  We had a gorgeous "Indian Summer" last week through today, but I know that frost could visit soon.  In fact, many inland areas of the city have already experienced their first frost.

My friend Beth from the Victory Garden Initiative called last week to tell me the nasturtiums at her Bay View Hide House plots were producing seed pods.  She knew I was looking for these pods to make "local capers."  Vera and I biked over to the garden, which was our first visit there.  What a beautiful block of the neighborhood.  I wish I'd had my camera!  Vera poked around among the raised beds and played with a toy wheel barrow, while I picked form Beth's bed.  I will make a brine for these pods this week then store them in the fridge in a small jar to use this winter in tuna salad, on pizza, and with pasta and other dishes calling for capers.  Here's the basic recipe I use.

Nasturtium or Milkweed Seed Pods "Capers"
Makes 1 pint

Adapted from Wild Fermentation by Sandor Ellix Katz.  The milkweed seed pods can be harvested earlier in the season so if you're interested, make a note for next year.  Nasturtiums will start to form seed pods anytime now. 


1 1/2 c. small, tender nasturtium or milkweed seed pods
Sea salt
1 to 2 heads garlic, optional

Dissolve salt in water, about 3/4 T. salt in a about 1 c. water, to create a brine solution.  Fill a pint jar with seed pods and garlic, if desired.  Pour the brine over the pods and garlic to cover them.  If you don't have enough brine, add a little more water and salt.  Be sure the pods and garlic and submerged in the brine.  Keep in the refrigerator and use as needed.  The "capers" should be ready after a week or so; the flavor will get better with time.

Also in the queue last week was drying and freezing peppers.  We harvested lots of hot peppers from our garden this season so I chose to oven dry them.  The bell peppers from our yard and our CSA I sliced and froze.  I will use these in soups, stir-frys, casseroles, etc. this winter--they work well in any dish that will be cooked since their texture will be more flimsy once they thaw.

While I'm discussing preserving, I borrowed a new book from the library last week--Canning for a New Generation: Bold Fresh Flavors for the Modern Pantry by Liana Krissoff.  One of the blogs I try to follow, Food in Jars, had a recent post about some new cookbooks she was checking out so I decided to check them out as well.  This is one of the selections I love.  It has all kinds of great modern preserving recipes, other recipes in which you can use your canned or frozen goods, and gorgeous photos to boot.  Even Vera loved it, though it makes me nervous when she looks at my library books because the first word out of her mouth is "color," meaning she'd love for you to put a pen or crayon in her hand so she can add her own embellishments to the pages.  She would turn to a photo in the book, point, and squeal "Oooh!" as if to say "Mommy, we should really try this!"

Portioned squash puree
Roasted "Fairy" squash
And appealing to her palate is what I'm constantly striving to do.  This past week I got in the mood to experiment a little with some new snacks for her, again trying to sneak veggies in whenever possible.  I made some winter squash crepes, which she mildly enjoyed.  We'll keep trying. You don't have to visit Montmartre to enjoy these sweet treats with a creamy filling.   The batter is simple to prepare, especially if you have a food processor.  And cooking them is almost as fun as making omelets (to me that's a blast!)  After roasting and pureeing the squash, I portioned it into a mini muffin pan, froze it, and will transfer to a freezer bag to use in soups, breads, and more crepes this winter.

Pumpkin/Winter Squash Crepe Batter
Makes 6-8 crepes

I made these into pinwheels for Vera thinking she'd like the eye appeal.  She had more fun unrolling them and eating the strips of crepe.

1 whole large egg
3 egg whites
1 c. all-purpose flour
1 c. whole milk at room temperature
1 T. honey
1/2 t. salt
3 T. mashed roasted pumpkin or winter squash
1 t. pumpkin pie spices or a combination of nutmeg, cinnamon, cloves, ginger, and allspice
1 T. flaxseed oil
Additional honey for garnish

Mix all ingredients in a food processor or blender.  The result is usable immediately.  Cook in a hot non-stick skillet or crepe pan until the top is dry, then flip.  Cook other side a minute or so.  Spread filling (see  recipe below) on crepe and roll-up or fold over.  Drizzle with a little honey before serving.

Pumpkin/Winter Squash and Cream Cheese Filling
Makes about 1 1/4 cup

8 oz. full-fat cream cheese, room temperature
1/4 c. mashed pumpkin/winter squash
1 t. honey

Mix all ingredients in a food processor or by hand.

Vera, Carsten, and Naana
We hosted some international friends this weekend, which was a great time.  Carsten from Stuttgart, Germany and "Naana from Ghana who lived in Botswana" live just outside of and work as attorneys in New York City.  With the gorgeous weather we had in Milwaukee we spent the weekend leisurely strolling the farmers' market, touring the town, eating, and enjoying great conversation around the table hoping they were able to unwind from the big city bustle.  I enjoyed probing them about the food and traditions in their respective cultures and had a great time cooking for everyone.  I tried a new recipe on Saturday night.  Knowing that my German side of the family enjoys pickled herring (at least my dad still does--he can clear a room over the holidays when he opens a jar and goes at it with his fork), I thought I'd serve some herring at least for Carsten's liking.  Fortunately Naana enjoyed it as well.  It's an intense, acquired taste, but a nice occasional treat.

Layered Pickled Herring Salad with Tart Apples and Red Onion
Serves 8

Adapted from a recipe originally printed in Bon Appetit, December 1996.

Cucumbers:
3/4 c. apple cider vinegar
3/4 c. water
1/3 c. sugar (I use xylitol)
2 t. pickling spices
1 t. salt
1 large cucumber (the last of our cukes on the homestead), cut into 1/8-inch thick rounds

Salad:
Herring Salad, Quick Pickled Cucumbers
1 lb. tart apples, peeled, cored, coarsely chopped
1 1/2 c. chopped red onion
1 c. sour cream
1/4 c. chopped fresh dill
Salt and pepper, to taste

1 1/4 c. sliced trimmed radishes
6 oz. jar cut pickled herring, drained each piece halved
Lettuce leaves
Fresh dill sprigs (optional)

For cucumbers:
Mix vinegar, water, sugar (xylitol), pickling spices, and salt in heavy medium saucepan; bring to a boil, stirring until sweetener and salt dissolve.  Cool to room temp.  Place cucumbers in a large glass bowl.  Pour marinade over, cover, and refrigerate overnight.

For salad:
Mix apples, red onion, sour cream, and chopped dill in a large bowl.  Season to taste with salt and pepper.  Using slotted spoon, remove cucumbers from marinade.  Arrange half of cucumbers in bottom of 8x8x2-inch glass dish.  Arrange half of radishes atop cucumbers.  Spoon half of apple mixture over radishes.  Arrange herring evenly atop apple mixture.  Spoon remaining apple mixture over herring.  Cover with remaining cucumbers, then radishes.  Cover and chill salad 3 hours.  Arrange lettuce leaves on platter.  Spoon salad onto leaves.  Garnish with dill sprigs, if desired, and serve.


10.05.2010

Something Else a Little More Intricate...

Purple Kohlrabi
Now that things have slowed down slightly I am back to spending more time planning meals and cooking.  I've had another itch to make "something a little more intricate." Tonight I decided to prepare one of the recipes hanging on my "Recipes I'd Like to Try" bulletin board in the spice pantry--Kohlrabi and Summer Squash Empanadas.  It had been hanging there so long that the squash is out of season so I had find a substitute ingredient.  After cleaning the fridge on Sunday I'd updated my list of "What Vegetables Are Currently Hanging out in the Fridge," which helps me keep track of what's lurking from our garden, our CSA box, and the farmers' market.  This is a handy resource when I need to plan dinner.  I've often wished for a website where one could simply type in the ingredients they have or want to use and it would search a database for a recipe to match (please let me know if any of you have heard of such a site...or is it just in my dreams?)  So I decided to substitute red bell peppers for the squash.  The peppers are by no means a textural or flavor trade-off, but I thought they'd mesh well with the other flavors in the recipe.  So I set out to make empanadas, a treat Ben always oohs and aahs about because it reminds him of the years he spent teaching English in Chile.  He occasionally reminisces about dishes he had there and I do my best to make something suitable.  Of course, I'm hardly capable of making traditional empanadas--not because I don't have several authentic recipes from which to choose, but because I like to do things a little differently and try new things.  I also used rendered bacon fat in the pastry recipe; part of any kind of homesteading is home economics and this was what I had on hand versus the vegetable shortening the original recipe called for--plus, I was down to my last stick of butter.  Enjoy the extra flavor; this is not low-fat.  Here's my spin.

Kohlrabi and Red Pepper Empanadas
Makes about 2 dozen empanadas

This time of year we have a lot of kohlrabi around--either in the garden or stored in the fridge.  It will store at fridge temp. all winter, but I'm running out of room.

Empanada filling
3 cloves garlic, finely minced
1 inch ginger, peeled and grated
2 medium kohlrabi, peeled and cut into a small dice
2 large red bell peppers, seeded and cut into small dice
2 large scallions, both white and green parts, finely sliced
1 T. extra virgin olive oil
1 T. butter
salt and pepper to taste
dash of freshly grated nutmeg
1 recipe pie crust (see below)
1 egg (for egg wash)
hot sauce

In a medium skillet, heat oil and butter over medium heat.  Add garlic and ginger and brown.  Add kohlrabi, pinch of salt and pepper.  Toss well and cook 3-4 min. until kohlrabi are softening a bit.  Add red peppers and continue to cook 4 min. more.  Add scallions, nutmeg, and another pinch of salt and pepper.  Mix well and cook one min. before removing from  heat. Season more to taste, if needed.  Set aside to cool.  Preheat the oven to 425 degrees.  Roll out dough a little thinner than pie crust typically is.  Use a bowl or round cutter and cut into 6-inch-ish circles.  Put scraps in a pile to "relax" and re-roll just once at the end so you can yield more circles (freeze the remaining crust to use again later.)  Brush the edges of the circles with egg wash, add a tablespoon or two of filling and fold over.  Press edges together with a fork to seal and place empanadas on a lined baking sheet.  Brush with more egg wash before baking.  Bake about 15 min. or until golden brown.  Serve with hot sauce.

Savory Pie Crust
Makes 2 crusts

I know my nutritionist/dietitian friends who are reading may cringe at the thought of bacon fat (all in moderation, of course).  The bacon fat can be substituted with lard, more butter, or vegetable shortening (even better, right ladies?!)  

2 1/2 c. unbleached all-purpose flour
1 t. salt
1/2 c. (1 stick) chilled unsalted butter, cut into 1/2-inch cubes
1/2 c. chilled bacon fat, cut or broken into small pieces
5 T. (or more) ice water

Golden brown and ready to eat
Blend flour and salt in food processor.  Add butter and bacon fat.  Pulse until mixture resembles coarse meal.  Gradually add cold water and pulse until the dough comes together.  Push dough into two flat disks and refrigerate at least one hour.  Pull out 10 minutes before you plan to start rolling it out.  This can be made ahead and frozen, if needed.

While I'm on the topic of using what's in the fridge, I will also provide a recipe for all those wonderful fall mustard greens you may plan to enjoy--so nutritious!  I'm growing a lot of them in my fall garden and will need to continue finding recipes for them.  This dish can use up a lot of mustards really fast.  I've also found that I can puree them and mix into some egg salad to give my daughter an extra kick of nutrients without her suspecting.

Mustard Greens with Lentils
Makes 6-8 servings

Adapted from Eat Fresh, Stay Healthy by Tony Tantillo and Sam Gugino


Lentils with Mustard Greens
2 lbs. mustard greens
Kosher salt
1 bay leaf
3 cloves garlic, peeled and lightly crushed
2 cups brown lentils
3 T. extra-virgin olive oil
2 T. balsamic vinegar
2 T. minced onions or shallots
1/4 t. ground black pepper
3 oz. crumbled goat cheese, optional

Cut off bottom 1/2-inch of mustard greens.  Then, with bunch on its side, cut crosswise into strips 1/2-inch wide.  Rinse and drain.  In 4-qt. pot, bring 2 qts. of water and 2 t. salt to a boil.  Add mustard greens, cover and allow to return to a boil as quickly as possible.  Cook 7 min. total, stirring once or twice to cook evenly.  Skim off greens and drain in a colander.  Save cooking water.  Run cool water over greens to retain color.  Add bay leaf, garlic, 1 t. salt, and lentils to mustard green broth.  Bring to a boil and lower heat to simmer.  Cook 20-25 min. or until just tender.  Drain, remove garlic and bay leaf.  Meanwhile, gently squeeze out moisture from mustard greens.  Put in a mixing bowl.  In a small bowl, mix olive oil, vinegar, shallots/onions, 1 t. salt, and pepper.  Add cooked lentils to mustard greens. Pour dressing over and toss.  Sprinkle with goat cheese, if desired.  Serve warm.

Yesterday I also made sorghum cookies and homemade bread.  Feels great to bake bread again.  To be honest, I didn't bake as much bread as I had wished this summer.  I strive to find a simple recipe and I may have finally found one.  The recipe for Cottage Granary Loaf from Bread for All Seasons by Beth Hensperger is easier than the recipe seems and is a beautifully fluffy and airy loaf.

We are mentally, but not yet physically, preparing for some internationally fabulous house guests this weekend.  Ben's childhood pen pal from Germany, Carsten, and his lady friend from Ghana, Naana, will be joining us in Milwaukee.  We are so excited!  This will motivate me to clean up a bit of the yard and garden before Friday.

I did a preservation presentation at Kohl's Corporation last Tuesday and in my thank you card was this awesome magnet.  I love it!

10.03.2010

Settling into Fall

LeFort Urban Homestead booth at Farm Aid 25: Growing Hope
Anna and Annie
I survived the weekend!  It was a wild ride preparing for the aforementioned events of this past weekend, but I made it and had a blast.  The dinner for Anna Lappe on Friday night was great fun.  Many friends and acquaintances attended so it felt like a big dinner party.  Got to meet Anna afterwards and she was fantastic (hopefully she'll send me a pic of us that I can post.)  Saturday I made a presentation about our urban homestead at the Nourishing Community, Creating Sustainability festival then headed down to Miller Park to exhibit at Farm Aid 25: Growing Hope.  When the Farm Aid staff first contacted me about setting up a booth I wondered how they had found me.  Apparently more people than I thought are paying attention to my blog.  I thank you ALL and I want to say hello and welcome to all the new people I met and spoke to yesterday at the booth.

So now I can exhale.  Ben and I both had big events on Saturday, plans we'd been working on for months. Today there wasn't a to-do list on my desk; there wasn't a schedule hanging over my head.  It was a pure Sunday where we could slowly wake up, maybe snuggle with Vera, make breakfast and relax with our coffee and tea after our first meal.  Ah.  I have a couple more classes and small events this fall, but otherwise I'm preparing to settle into the cooler weather, make a big pot of soup or chili every Sunday (bringing back "Souper Sunday!"), pick up some knitting projects, and hopefully catch up on some reading.  I won't go so far as to completely hibernate, but I will definitely slow down.  Before that totally unfolds, there is still a lot to harvest from the garden (turnips, beets, rutabagas, eggplant, dried beans, broccoli, luffa, herbs, greens, leeks, kohlrabi, radishes, kale, etc.)

I'm going to try to sneak one more late summer recipe in here.  If you still have tomatoes and zucchini, then this one's for you.  I tried it last week as a soup then by week's end it had evolved into a pasta sauce.

Bisque of Mediterranean Vegetables (a.k.a. Mediterranean Vegetable Pasta Sauce)
Serves 6 as a soup, 8 as a sauce

3 T. grapeseed oil
1 medium eggplant, sliced
1/2 red onion, peeled and quartered
6 ripe tomatoes, halved
2 red bell peppers, halved and seeded
6 medium zucchini, halved
1/2 lb. potatoes, small dice
1/2 bulb fresh fennel, small dice (can also sub. the fronds from one head of fennel, chop coarsely)
3 cloves garlic, minced
1/2 t. allspice
Vegetable stock to cover vegetables
Fennel fronds, to garnish
Plain whole milk yogurt, to garnish

Heat the oil in a small stockpot over medium-high heat.  Add all vegetables and saute until soft.  Add allspice and mix to combine.  Add stock and cook a few minutes longer.  Puree in a blender or food processor.  Garnish with fronds and dollop of yogurt.  Alternatively enjoy over pasta--add some Italian sausage if you like (the fennel seeds in the sausage go very well with the fennel in the sauce).

Spiced Apples
Apples from the Sucharda family apple tree
Last week I also preserved the rest of the apples I'll put up this year.  The impetus for that was my display at Farm Aid, but last Sunday a bunch of apples almost, literally, fell into my lap when we attended a 1st birthday party and they said they weren't going to pick apples from their backyard tree this year.  I made a batch of apple chutney as well as a small batch of spiced apples.  The spiced apples were of the variety they used to serve us in grade school on our lunch trays--reddish-purple rings of apples with hints of cinnamon and cloves.  Only these weren't red-colored; I didn't feel it was prudent to put food coloring and red hots into my apples as the recipe called.  Knowing these two ingredients we not pertinent to the safety of the canned product, I left them out.  Actually, I tried to add fresh beet juice to the mix for red color.  By the time it cooked down, the color had faded, though the flavor is still reminiscent of the lunchroom at Crestwood Elementary school.

It's quiet around here today--Ben and Vera went to the Brady Street Pet Parade--so I'm taking advantage.  Hoping to unpack from the weekend then spend some time refamiliarizing myself with my own kitchen and fridge (yay, fridge cleaning time--as you know I honestly love that task!)

Once again, welcome to any new followers and thanks to all the loyal readers.