...Growing, Building, Cooking, Preserving, Crafting...

2006 began our urban homestead when I broke ground on a garden, which now includes perennial fruits, flowers, & many vegetable varieties. We dream of solar panels, keeping bees and hens. Until then we'll continue growing and preserving our own fruits and vegetables, building what we can for our home, cooking from scratch, and crafting most days.

5.27.2011

Spring Recipes

Though we still haven't had an extended period of official spring weather I've been feeling a bit more momentum with spring foods, both wild and cultivated.  Last night's dinner was an attempt to get as many of the season's available flavors into one delicious dish.  I came up with some "spring" rolls.  I'm sure that I've made spring rolls before--at least in culinary school.  If so, I needed a refresher course on exactly how to handle the rice paper.  I found a helpful hint via another blogger and had no trouble with the rice paper being too sticky.  In fact, it was so easy to work with that I think I'll be making a variety of spring rolls this summer with the garden's offerings.  I won't say my first--or at least first in a long while--attempt was great, but it could have been much worse.  Had they not been so steaming hot at the table, I think Vera would have been more into them, but the upside of that was that I got to eat her leftovers!

Crispy "Spring" Rolls with Lime-Mustard Dipping Sauce
Makes about 12 spring rolls

I adapted this recipe from Louisa Shafia's Lucid Food to include as many fresh spring ingredients as I had on hand.  The original recipe called for sheets of yuba, a product for whose processing method I have much respect from when I used to make soymilk and saw the yuba "skin" form on the surface.  It's  a mystery to me how they make these delicate sheets on a large scale.  


Circular rice paper
Spritzing bottle
Paper toweling or multiple layers of thin towels (like floursack towels)

Filling:
4 T. coconut oil, divided
8 shiitake mushrooms, stems removed and thinly sliced*
1 large carrot, peeled and julienned
1 large sunchoke, scrubbed and shredded (about 1/2 c.)
2-3 ramps, cleaned and chopped
1 T. minced fresh ginger or 1/4 t. ground ginger
1 clove garlic, minced
1 T. pure maple syrup
1 T. fish sauce (nam pla)
2 T. sesame oil, divided
2 c. firmly packed shredded green cabbage
1/4 c. freshly foraged catnip, chiffonade
Salt

Sauce:
2 T. lime juice
1/2 t. sesame oil
2 T. honey
1/2 t. fish sauce
1 T. Dijon mustard
Salt

Preheat oven to 400 degrees F.  Grease baking sheet and line with parchment (or just line with silicone mat.)  Heat 2 T. coconut oil in large saute pan and add shiitakes.  Cook, stirring, for 2 min., then add carrot, sunchokes, ramps, ginger, garlic, maple syrup, fish sauce, and 1 T. sesame oil.  Cook for 5 min.  Add cabbage and cook for 1 min. more.  Remove from heat and stir in catnip until it wilts.  Season to taste and let cool on a baking sheet or other shallow container (will cool fastest when most surface area is exposed.)  In a small saucepan, melt the remaining 2 T. coconut oil then add remaining 1 T. sesame oil--reserve for brushing.  Prepare rice paper by placing paper towel on plate, spritz to dampen, top with rice paper, spritz, top with paper towel, spritz, top with rice paper, and so forth until you've dampened as many rice papers as needed.  Let rest until fully moistened then begin with first rice paper.  Add about 1/4 c. of vegetables in a line 1-inch wide along sheet.  Fold in short ends then fold bottom of rice paper over.  Gently pull flapped-over bottom/filling towards you to tighten, then roll up.  Stickiness of the rice paper will make its own seal--no need for extra water or egg wash.  Place seam side down on prepared baking sheet and repeat rolling remaining rice papers with filling.  Before baking, brush all spring rolls with sesame/coconut oil.  Bake 15-20 min. or until golden.  Meanwhile, prepare sauce.  Whisk together all ingredients.  Season with salt, to taste.  Serve rolls hot, sliced in half on diagonal if desired, with dipping sauce.

*(if using dried, boil until soft--reserve cooking liquid for another use in soup stock or a sauce--then slice.)

Filling
Cooling on a Sheet Tray
Ready to Roll
Glistening--Just Out of the Oven
Beautiful Beef Fat
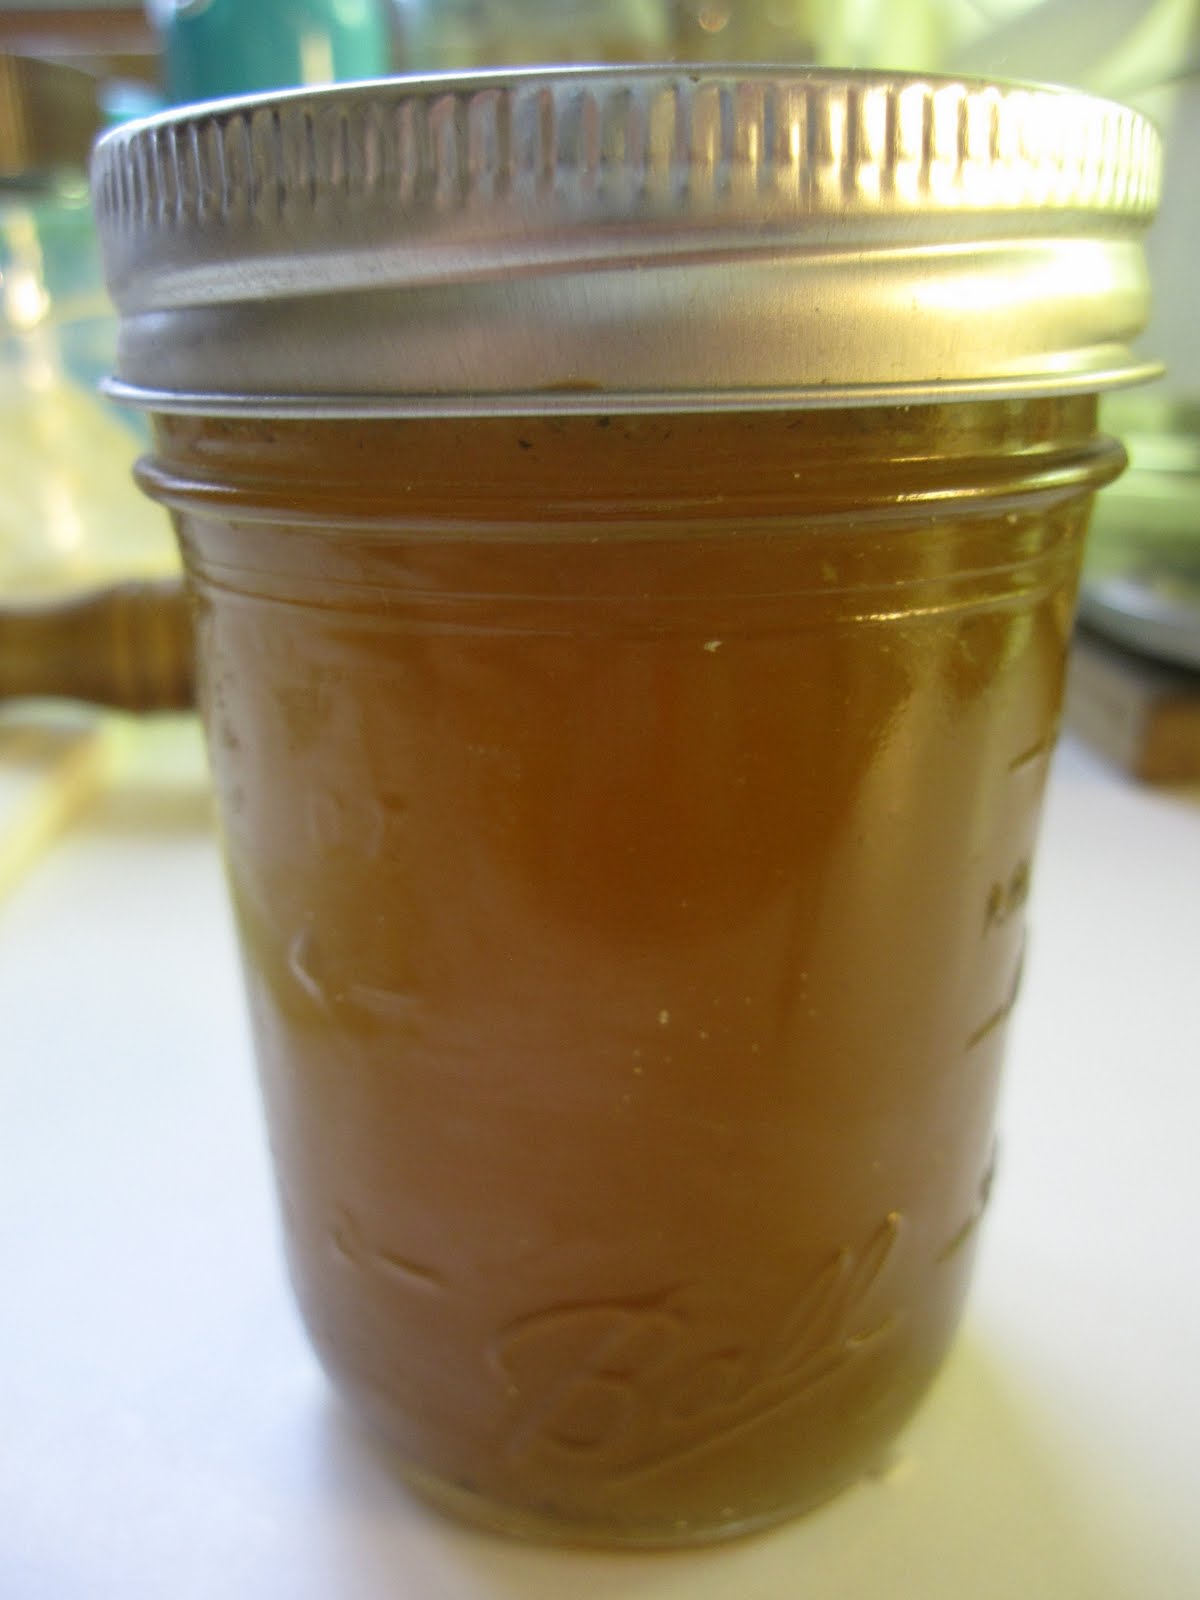
Another interesting culinary project that came my way this past week was rendering beef fat.  I recently got my hands on 25 or more pounds of antibiotic/hormone-free, grass-fed beef fat when I organized a half steer order with some friends.  No one else wanted the fat and we were paying for it anyway so I volunteered to give it a try.  To be honest, I thought I would just use it for grinding into my sausage in the fall, but this amount of fat would take forever to use that way.  After that realization, I was feeling a bit--actually VERY--overwhelmed by the amount of beef fat with which I had to deal.  Not only did I have to figure out how to wedge it into my basement freezer along with the other meat and the 2010 season's remaining vegetables, but I had to explain to Ben what it was doing there and THEN proceed to figure out how to use it.  Cue the internet, such a great resource for culinary explorations in instances like this.  When I have a lot of ingredient x on hand and am looking for creative ways to use it, I just plug it into my search engine.  Et voila!  My attitude about the fat quickly turned around when I learned more about its health benefits (my Gramma Cille would be proud) and realized I had a very special ingredient here.  Actually, I was feeling a bit sorry for the others who shared the steer because they'd simply be grilling their ribeyes and filets while I was practically bathing in beef tallow (that is, if I chose to make soap with it...but I'm not going that route.)  I can use it for pie crusts (the farmer suggested using half lard, half tallow), frying (remember McD's fries of olde?  Were they really bad because of the fat in which they were fried...I'm starting to think it was a conspiracy), baking (think mincemeat pie!), and even making birdfeeders (tallow is the rendered fat from beef suet.)  I put the first bag of beef fat into a large roasting pan last Saturday night--realizing that if the predicted rapture materialized that I'd be spending my last hours on Earth engaged in this activity of melting steer blubber (wouldn't have it any other way!)  I started the process at 200 degrees F, but realized that 250 was better for speeding it up without "cooking" the fat.  A few days later I had at least eight glass pints of gorgeous beef tallow.  I froze most of it, but will keep a jar in the back corner of my fridge next to the bacon fat and pig intestines (for stuffing sausages).  (Yes, we've already established that the contents of my fridge are a bit out of the ordinary.)  I will keep you posted on how I use the fat.  But basically I'm thinking that I won't buy ghee for a while and just substitute tallow as needed.

Suet Melting in the Pan
Just-filled Jars


Cooled and Ready for the Freezer

Had some garden-fresh spinach tonight on our Friday pizza.  A quick saute and it was ready.  Yum!


5.25.2011

Spring Foraging

Wild Mustard
Garlic Mustard

I've been crawling around in the wild the last few days gathering edibles for preserving.  V and I went out early Saturday morning to hunt for ramps in the woods.  Two grocery bags loaded into the back of the bike trailer and we were ready to go.  Earlier this week I canned pickled ramps and froze ramp confit.  I also prepared ramp soup and still have half a bag in the fridge to use fresh this week.


Pickled Ramps
Ramp Soup with Chive Yogurt (for the dairy-eaters)

Ramp Confit
This is the first season I've attempted to preserve dandelions, which will forever remind me of my childhood--not only rubbing the bloom's pollen on my arms and legs to make them yellow and blowing the seed heads, but also of my severe lack of interest in youth sports.  As my dad will tell you, when I was assigned to play outfield on the softball team I'd be out there squatting down picking flowers (probably dandelions) as a ball was coming.  "Annie, look up, catch the ball!" my dad would yell (or something to that extent) as he retold it, yet again, during his toast at our wedding reception.  Yesterday Vera and I ran around the park picking these prolific yellow weeds--a back-breaking task.  (If you choose to use dandelions for food make sure you pick them from an area not sprayed with pesticides.)  I thought V would be helpful because she's a bit shorter and wouldn't have to bend as far to pick the blooms.  She knows her colors so when I instructed her "just pick the yellow ones" I thought she'd have no problem and even a little fun.  Instead she carried the bag for a while then ran loose across the public lawn weedy with a carpet of creeping charlie among the dandelions.  We hopped back into the stroller and combed the lakefront until I pulled up all the garlic mustard I felt I could realistically process today.  I also found some wild mustards, which I may add to a salad or throw into my garlic mustard pesto (stay tuned.)  Today I made jelly out of the dandelions.  It's very rich so I will likely use it in small doses when the time comes.

Lavender-Infused Dandelion Preserves
Makes 3-1/2 pts.

Lavender-Infused Dandelion Jelly
This jelly is as rich as honey.  If you want it to be more clear simply "infuse" your sweetener (sugar or xylitol) with lavender by adding a sprig or two of fresh lavender to a small container of sugar/xylitol and letting is sit for a month.  Remove the lavender and use the scented sweetener.


3 c. dandelion blossoms, separated from leaves and bracts
3 c. purified water
1 1/2 c. xylitol
1/2 T. dried lavender
1/4 t. vanilla extract
2 t. calcium water (comes with Pomona pectin)
1 T. lemon juice
3 t. Pomona's Universal Pectin

Boil flowers in water on medium heat for about 10 min.  In the meantime, add xylitol to food processor with vanilla and lavender, process until lavender is "dust" mixed into xylitol.  After petals have boiled, strain from liquid and return liquid to pot and add calcium water and lemon juice, bring to a boil.  In the meantime, to infused sugar, add pectin and stir to completely combine.  When dandelion "juice" is boiling, add xylitol/pectin and stir constantly for 2 min. to completely dissolve sweetener.  Return to boil then remove from heat.  Filter through small colander placed over jar-filler and fill warm, sterilized 1/2-pint jars with jelly, leaving 1/4-inch headspace.  Remove air bubbles, wipe rims, and cap with treated, sterilized lids.  Adjust screw bands and load into hot water bath canner.  Once canner is boiling, process jelly for 10 min.  Remove carefully and let cool at room temperature until completely cool.  Check seals.  Label and store.

Gray/"Silver" jacquard fabric
I've also had a chance to continue sewing this week.  Ben and I found some down time on Saturday afternoon while V was napping and I cut out a dress for myself and a 3T dress pattern for Vera.  I can't wait to finish the dress I'm making.  I've been in a gray and black stage for a while as I find it makes my pared-down wardrobe more versatile.  I'm continuing this personal trend with a gray jacquard fabric I found in my fabric cabinet--I believe I bought it at either an antique store or the antique flea market a couple of years ago.  With some creative pattern piece placement, I was able to s-q-u-e-e-z-e this dress out of the limited fabric I had.  We'll be attending a couple of weddings in the fall and I know at least one of them will be fairly elegant so I intend to get a couple of wears out of this outfit soon.  Just like my mom used to do--special event coming up, she'd make herself a new dress.  It feels great to sew something for myself--feels like it's been ages.

You may have heard that a temporary backyard hen ordinance has been passed in Milwaukee.  There will be a one-year trial period, which I think is a completely fair way to approach the project versus continuing to just shoot down the proposals after listening too much to the opponents.  Of course many people have contacted me wanting to know when I will have my chickens out back.  I honestly didn't see this happening so soon and therefore I've already planted my entire backyard with veggies, not leaving any room for a coop or run.  I'm interested in getting some beehives on our property first (next season) and am still running the chicken thing through my head considering my egg-free diet.  I'd likely be the one taking care of them and then not getting much out of it foodwise--of course there's the beautiful manure and the bartering possibilities.  But maybe I should wait until Vera's a little older and can help care for these critters and clean their house.  By then perhaps I'll have my dream garage rooftop garden and can give up more of my backyard growing space to some family pets.  For now I'll just live vicariously through a fellow craft blogger who keeps chickens in Madison.

I'd like to share a few snapshots of the spring garden to brighten up this dark, rainy spring day.  Can't wait to see how things bust out once the sun returns.

Radishes 
Salsify
Espalier Apple Tree (with weight)


Other Espalier Apple Tree (w/ garlic below)
Spinach from Coldframe
Red Lima Beans

5.19.2011

Sewing Season


Warm(er) weather for me not only means time spent in the garden, but more time at my sewing machine--one of my favorite places in the house.  I put the finishing touches on a summery dress for Vera last night.  I must have cut out this pattern months ago and made my first stitches probably in March.  Needing a change of scenery this past week with some very cold spring weather still whipping away outside, Vera and I went down to the basement and she sat (or wiggled and squirmed, rather) on my lap and watched me sew.  Once I got back to this project I realized how simple it was; finishing up took just an hour or so.  As my husband will tell you, it seems like every craft project I surmount, whether knitting or sewing, I always run into some sort of challenge that temporarily makes me crazy.  Attaching the bias tape then top-stitching the armholes of this dress proved to be the sticky point.  I am not totally satisfied with how the armholes turned out, but it was nothing a little trim couldn't fix.  I've been known to cover--or detract from--a rough spot or mistake with a little rick rack (as you'll recall with this outfit I made for V last year.)  Once again this dress cost me next to nothing--the fabric was from the thrift store, the buttons from the antique flea market, the rick rack from a rummage, and the thread donated by my mom.  I did buy the pattern new, although I got it at a deep discount after watching the local sales fliers for months.  It can be worn by itself or with a top underneath.  I found this purple smocked-waist dress on a recent thrifting trip and have found that it makes a nice sort of petticoat to give the bottom a little fluff.  Vera seemed to approve of the final product this morning as she gave her usual "OO-ooh!"  And immediately glommed onto the shiny purple buttons.

I love this offer from the "vintage" rick rack package--if only every child sewed these days.
If you haven't noticed, the weather has been wild lately.  Those high winds last weekend ripped the floating row cover off my original raised bed a couple of times and the bush beans I snuck into the ground just a hair early suffered some damage.  I have managed to get more seeds in the ground this week.  I attached some wire ("pig-panel") trellises to the fence on Mother's Day weekend and planted pole beans and cucumbers at their bases this week.  Also had to reseed my snap peas which had been swiped out of the ground by the critters.  This time I pre-germinated them and covered them with hardware cloth.  The good news: the radish/turnip bed looks excellent and the umbelliferae bed is really coming along (I was surprised how quickly salsify can germinate.)  I'm hoping to get out this weekend to grab some ramps (wild leeks) from the woods before they're gone.  I am salivating over a recipe for bacon/onion preserves that I think would benefit from the sharper flavor of the ramps.  I'm also hoping to gather lots of dandelions to either make dandelion wine (my namesake great-grandmother used to make this though she herself was a teetotaler) or dandelion jelly (inspired by my friends at Cooking in the Garden Unit).  I guess I'd better get my canning kettle shined up.

In case you're wondering, I'm still strongly adhering to my "special diet."  People often ask me if I'm still avoiding the offending foods.  Although I'm lucky none of them are life-threatening allergies, I am still taking it very seriously because I know I feel so much better without dairy, gluten, soy, and eggs in my system right now.  I will admit that I occasionally get a craving for cheese.  I finally tried my hand at a vegan/gluten-free "mac 'n cheese" recipe.  Child and husband approved, it was a success.

Cashew Mac-n-Cheese
Serves 4-6

This recipe was inspired by The Spunky Coconut, one of the food blogs I follow.  Of course, I had to tweak it a bit based on my ingredients I had on hand.  I used Tinkyada gluten-free spinach spaghetti, which I think has the most amazing texture, but a smaller noodle would make it more like the original.


Pasta:
4 c. Tinkyada pasta
1 T. salt
Boiling water

Sauce:
1 c. plain cashews, soaked overnight to soften
1 c. water
1/2 vegetable broth
2 T. ghee
1 T. nutritional yeast
1/4 t. each dried basil and oregano
1 clove garlic, minced
1-2 t. onion powder
2 T. arame (seaweed)
1 t. lemon juice

Tips to steam for soup garnish
Cook the pasta for about 14 min. in highly salted water.  Drain and set aside.  In the meantime, make the sauce by blending all of the ingredients in the food processor until fairly smooth (the bits of cashew that don't blend actually remind me of Parmesan cheese in a noodle dish!)  Pour the sauce over the noodles and serve.

I made some asparagus soup on Monday night as well, but I will wait to give you a recipe as I was not totally pleased with the results and am still experimenting.  But it felt good to have some of the season's local flavors finally on our table.  Speaking of asparagus, the crowns I dug up last year to investigate their health did not, in fact, sprout this year so I'm guessing they're done.  I will have to replant next season and wait another three years for a decent crop.  Such is life on the homestead.  It teaches patience I guess.

5.15.2011

The Season's Begun!

"Shagadelic"
The season's officially begun...antique flea market season that is.  The Elkhorn Antique Flea Market kicked off its season today rain or shine.  All the die-hards were out, including a couple girlfriends and me.  So many awesome vintage pieces, so much cool old "stuff."  My list was short and I didn't end up finding the top item, but I did score a cool shag rug for our ever-evolving den/guest area/play area/reading corner/landing in our cozy second floor.  I'm thinking ahead to when V will want to have sleepovers and the girls will need a space to hang out, giggle, tell stories, and watch movies.  I don't plan on purchasing a second television--in fact, I'm determined to go without once our current tube (acquired circa 1999) kicks it--but I figure by that time the kids will know exactly how to hook up our computer to watch a film.  Right now there's a single sleeper-sofa, bookshelf, a big basket of warm blankets, and my recent "floor score."  This new addition is a rust/orange combo, which goes well with the unintentional warm peach, lake blue, and rust tones that seem to have taken over the upstairs.  And it goes well with my favorite part of our house--the rustic painted sub floor in what used to be the attic (you had me at spring green.)

I packed a picnic lunch for the flea market today as a thank you to the other two ladies who drove their vehicles with maximum cargo space for our goods.  I tried a new dessert, inspired by a trip to the Asian market where I saw lots of desserts made with adzuki and mung beans.  I tweaked this slightly from the original recipe and was happy with the results.


Red Bean Jam Granola Bars
Makes 9-12 bars

2 c. rolled oats
2 T. chia seeds
5 T.  sorghum syrup
2 T. coconut oil, melted
pinch of salt
2 T. sesame seeds
1 1/4 c. red bean jam (see recipe below)

Preheat oven to 350 degrees F. Line 8X8 pan with parchment paper. In medium bowl mix together oats, chia seeds, sorghum, coconut oil, and salt. Press 2/3rds of mixture into prepared ban. Let pan sit in fridge to allow base to firm up for 10 minutes. Spread red bean jam in smooth layer on top of base. Add sesame seeds to remaining oat mixture. Evenly distribute oat mixture on top of red bean jam. Bake for 25 minutes. Allow to cool in fridge before cutting into bars. 


Homemade Red Bean "Jam"
Makes 1 1/4 c. 

1/2 c. Adzuki Beans, soaked overnight and cooked under very soft. 
1/2 c. water
1/4 c. honey
1/4 c. ground coconut
1/2 t. salt

Place all ingredients in a food processor and process until smooth.


I've been on a real sunchoke (jerusalem artichoke) kick lately.  I mentioned sunchoke chips in my last post. I ground some of them coarsely and added them to a gluten-free cashew butter cookie that also contained ground cornflakes.  And mid-week I used that same cornflake/sunchoke crumb combo to bread some falafel.

My Favorite Falafel
Serves 4

2 c. dry chickpeas soaked overnight and cooked until tender
1/4 c. lemon juice
1 shallot or 1/2 small onion, finely diced
1/2 t. ground cumin
1/2 t. red pepper flakes
3 garlic cloves, minced
2 t. salt
3 T. freshly chopped parsley
1 1/2 c. cornflake/sunchoke crumbs
1/4 c. canola oil

In a food processor, process the chickpeas, lemon juice, and 1/4 c. water until almost smooth.  Transfer to a large bowl and add shallot/onion, cumin, red pepper flakes, 2/3 of the garlic, 1 t. of the salt, 2 T. of the parsley, and 1/2 c. of the cornflake/sunchoke crumbs and mix well.  Roll into 16 balls (about 2 inches in diameter) and flatten slightly to form patties.  Place the remaining cornflake/sunchoke crumbs in a bowl or dish.  Dip falafel patties in the crumbs, coating evenly. 

Optional dip: In a medium bowl, combine yogurt and pepper with remaining garlic, salt, and parsley.  Mix well.  Cover and set aside. 

Heat half the oil in a large skillet over medium heat.  Place 8 of the chickpea patties in the pan and cook until golden brown, about 2 min. per side.  Drain on paper towels.  Add the remaining oil, if necessary, and cook the remaining patties.  Drain. Alternatively, bake at 350 degrees F until golden brown, about 15-20 min. Serve with the yogurt dip, if desired.


5.09.2011

New Classes Posted!

...and apparently I\
"I Eat Local Because I Can."
UPDATE: I just added a bunch of new classes to my teaching schedule.  They are part of what I'm considering a homesteading series though it's not formerly billed as such.  Even if you've attended my food preservation classes before, check out the dates and times because you might find a new topic of interest.

In other news, it was a fine Mother's Day holiday for me.  A jaunt down to the Chicago environs made for a lovely, relaxing weekend with my in-laws as we not only celebrated what it means to be a mother, but two birthdays in the family.  I took a short, but peaceful walk with V on Sunday morning through Gram-E and Gramps' neighborhood as we checked out the duck pond, spring blooms, and flowering trees.  I pondered why my daily life couldn't be that slow-paced.  I know I have to make it that way, I can't wait for it to happen.  Let's put it this way, I'm in transition to make things more peaceful and less chaotic.  Stay tuned and hopefully I'll have updates soon on my progress.

Quick Snack
In the meantime, "re-entry" into the real world was a bit stressful today, but taking a walk around the garden this morning and observing what's sprouting and budding helped me focus again.  I begin another week of feeding my family, tending my garden, and keeping up with a little one.  Speaking of feeding a little one, the quest for healthy and easy-to-prepare snacks continues.  Last week I had an idea to make finger jell-o from scratch.  Apparently finger jell-o isn't universally known because I've already found a few people scratching their heads when I told them I was making it--including my husband.  It's basically a gelatin product that's sturdy enough to be cut and eaten with the fingers.  Remember Jell-O Jigglers?  The question was, how could I sneak something healthy into this snack?  I turned to the trusty Acme juicer that my mother-in-law passed along and juiced some fresh beets, cut their vegetable-y flavor with some apple juice and added the gelatin.  So far it's been a mild success.  Perhaps once we use some fun-shaped cookies cutters to make stars and hearts it will catch on.  I'm already thinking of the next combo--carrot/apple, cucumber/pear...I'm sure the possibilities are endless.  P.S.  I don't know that this is a great car snack--at least not the beet flavor (it's as messy as beets are otherwise).  I learned this the hard way as we were driving today while V was nibbling on some in the back seat and I soon heard "I need a new skirt."  It was also between her toes, smeared on her legs, and coating her shoes.  Whoops.

Juice Finger Jello
Makes about 16 1 1/2-inch squares

2 c. 100% fruit/veggie juice, divided
3 T. unflavored gelatin
2 T. honey or xylitol

Pour 1/2 c. cold juice into 8x8-inch square glass baking dish.  Sprinkle gelatin evenly over it and let sit for a few minutes to be absorbed by juice.  In small saucepan, heat remaining 1 1/2 c. juice and sweetener until starts to boil.  Add hot juice to pan and stir mixture until gelatin is completely melted and dissolved.  Refrigerate for 2 hours, then cut into squares or other fun shapes.  Pick up a square and eat with your fingers.  Stores well in refrigerator.

Cuke-Fruit Smoothie
I was at the grocery store last week and on the reduced produce cart there were bags of cucumbers that were still in good shape.  Though they weren't local or even seasonal, I couldn't see them go to waste.  People always say that regular cukes aren't much good for freezing.  I beg to differ.  One can make a pureed chilled cucumber soup and freeze it or, easier yet, peel and freeze these summer fruits to throw into a smoothie later.  Last week we made lots of fruit/veggie smoothies using not only these discounted cucumbers,
but lemony sorrel from our garden, coconut milk, bananas, honey, protein powder, hemp seeds, etc.  Vera sucked it down and asked for more.  We also love to add spinach, spices (cinnamon, turmeric, ginger), flaxseed oil, bee pollen, probiotic powder, home-canned or frozen fruit, and chia seeds to our smoothies.

One last adventure I had in the kitchen last week was making sunchoke chips.  B has a salty-tooth and a crunchy-tooth, but I've tried to cut back on bringing bagged chips into the house for various reasons--expense, health-wise, and the fact that they never last very long and so therefore become even more expensive to replenish.  I still have some sunchokes in my crisper from last fall--they store extremely well when overwintered.  I sliced them very thinly with my Japanese slicer, tossed them with salt, pepper, and olive oil, and baked them at 350-375 degrees until they were crispy, tossing occasionally.  They are delicious--VERY rich in flavor.  So one only needs a small handful at a time.  The same could be done with any root veggies--a la Terra Chips.  Easy and much cheaper.

Sliced Sunchokes


Finished "Chips"


5.01.2011

It's Alive!

The front is all cleaned up and ready to enjoy (and my lettuces are coming up in the raised bed)
Sunny and above 50 degrees today!  Despite the fierce wind blowing off the lake we managed to get outside and work, work, work for a few hours.  Vera somehow senses the timing of this annual yard cleanup because she once again went into torpor mode and pushed a three hour nap.  Amazing!  In the meantime my main focus was to transfer the winter compost to the outside summer bin and give the winter bin and all worm tea catch trays a thorough sudsing and rinse.  Ben's main project was to rake all the leaves from the front hill.  As he worked he uncovered many native plants, pale and gasping for sunlight, and was pleasantly shocked at how much perennial growth was well underway and pleased with how little mulch he raked away in the process (yay, we won't have to buy any this season!)  I also bird-proofed my strawberries by pinning down some fine netting--formerly bulk-size onion bags, threw some more seeds in the ground, did some shrub pruning and otherwise manicured both back and front yards--it's refreshing to work on the details after a larger back-breaking task.  Ben repaired our sunniest raised bed where it had warped and split open late last season after he admittedly constructed this final bed in haste last spring.  It was an afternoon of hard work that deserved a beer and glass of wine as we stood on the front sidewalk surveying our work.  Though I love to expand our growing space each year, so far it has felt amazing not to have any large projects in the queue.  This time last year Ben was pounding together four of the aforementioned raised beds, I was toting and shoveling multiple cubic yards of topsoil and mulch, and hauling field stones from the brickyard to build another bed.  Whew! This year I will work with the beds I have and see how I can expand my vertical growing space otherwise.  But don't think I'm not thinking down the road to expansion next season.

After an honest day's work we decided to fire up the grill for the first time this season though we most certainly aren't the first on the block to heat up the coals.  Our southern side neighbor has been grilling for at least a month now.  In fact, I think he made their Easter ham on the grill last weekend because I was subjected to the absolutely mouth-watering aroma of what I assumed was some sort of sweet, smoked pork for at least two hours.  (Cue the Homer Simpson drool sound effect.)  We kept it simple this evening with our homemade brats and potato salad.  I love potato salad and could eat it year round warm or cold, but have had to adapt my recipes to exclude mayonnaise or dairy-based dressings.  Tonight I may have found another winner--creamy yet sans cream.  If I haven't said it already, this is the time of year when eating locally can get really tough--last season's supply is just about gone, but it's a bit too early to have much sustenance from outdoors.  Fortunately, I still have potatoes on my cellar rack, blanched green beans in the freezer, and other odds and ends I can use to make a decent side dish.

"Creamy" Potato and Green Bean Salad
Serves 4-6

I used blanched frozen green beans, but one could certainly save this recipe for later in the season and use fresh blanched beans.  I froze 1/4 c. chunks of cauliflower puree last fall to deceptively mix into some of Vera's foods without altering the color/flavor too much to let her know it had veggies.  This puree was one key--along with slightly overcooking the potatoes--to making a creamy salad.  It's slightly sweet from the apple juice concentrate, but well balanced with saltiness and piquancy from the seasonings.  


4 c. potatoes, washed, skins in tact, cut into 1-inch chunks
1/2 lb. blanched green beans, cut into 1-inch pieces
1/4 large onion or one small onion
1-2 cloves garlic, peeled
1/4 c. fresh parsley, stems removed (and reserved for stock)
1/2 c. cauliflower puree
1/4 c. olive oil
1 t. apple juice concentrate
2 T. Dijon mustard
1 1/2 t. fish sauce (or soy sauce if you use it)
1/2 t. dry dill (or 1 t. fresh dill)
1/2 t. celery seed
Dash paprika
Salt and pepper, to taste

Boil potato chunks in well-salted water until just beyond done (as mentioned, extra cooking time will add to the creaminess.)  Drain and spread on a sheet pan to cool more quickly.  Thaw green beans if frozen and blot on paper or cloth towel.  In the meantime, combine remaining ingredients in food processor and puree until smooth.  When potatoes are cool, add to a mixing bowl along with green beans.  Add dressing from processor and combine.  Adjust seasoning as needed.

To back up a bit, we kick-started our day of planned work with a vegan "lumberjack" breakfast--my favorite gluten-free pancake recipe and a quick fruit "sauce."  We try to make pancakes at least once per weekend.  When we do I'm always thankful that we don't have to work as hard as Jack in one of Vera's favorite books Pancakes, Pancakes!  Though it's not a bad idea for her to consider where each of the ingredients came from, I'm not going to make her milk the cow, winnow the wheat, churn the butter, and collect the eggs beforehand--at least not yet as the homestead is still in its infancy (wink.)  Ben is always amazed at how quickly I can whip up some pancake batter, but I tell him that if you have everything on hand and especially if you make them nearly every weekend, it becomes a snap.

Gluten-Free, Sugar-Free, Vegan Pancakes
Makes 6-8 pancakes

Though the name of this recipe may make it sound like "well what in the world IS in it?" I promise these have an excellent fluffy texture and can be jazzed up with different fruits, nuts, even granola.


This morning we added vegan/GF choc. chips to the batter
1 c. brown rice flour
3 T. tapioca flour
1/3 c. potato starch
1 1/2 t. baking powder
1/2 t. baking soda
1/2 t. salt
1/2 t. xanthan gum
1 T. egg replacer
1/4 c. water
3 T. olive or grapeseed oil
1 c. almond or rice milk (or whatever kind of milk you prefer)
Dash of cinnamon, ground ginger, allspice, cloves, or whatever "warm" spices you wish
1/4-1/2 c. granola, blueberries, raspberries, cranberries, nuts (optional)--if you add one of these options, increase the milk content for the right consistency

In a bowl, mix together rice flour, tapioca, potato starch, baking powder, baking soda, salt, xanthan gum.  Stir in egg replacer, water, oil, milk and spices until well-blended and few lumps remain.  Stir in optional fillings.  Heat a large, well-oiled skillet or griddle over medium-high heat.  Spoon batter onto skillet and cook until bubbles begin to form.  Flip, and continue cooking until golden brown on bottom.  Serve immediately with condiments of your choice.

Quick Fruit Topping for Pancakes
Makes 2-3 c.

2-3 c. of fresh or home-canned or fresh fruits such as peaches, bananas, plums, apples, etc.
2 T. maple syrup
Dash salt
Dash ground ginger (optional)

Combine all ingredients and let sit until ready to use.

Of course I can't let this household go too many days without having something sweet on hand.  No matter what kind of limited diet I'm on, I have to get my fix.  This weekend I decided to make some cupcakes just for fun and was very happy with the results.  I've reminded Ben that we are "adapting our expectations of sweetness" lately, but I believe these treats satisfied his equally intense sweet tooth regardless.

Chocolate Glazed Coconut Macaroon Cupcakes
Makes 1 dozen

These cupcakes didn't caramelize one bit during baking.  Their snow white appearance along with their delightful chewiness and slightly more dense texture (compared with cupcakes made with regular flour) reminds me of coconut macaroons.


3/4 c. sorghum flour
1/3 c. plus 1 1/2 t. cornstarch
1/3 c. plus 1 1/2 t. tapioca flour
1 c. granulated xylitol
1 1/2 t. guar gum
1 1/2 t. baking powder
1/4 t. (plus a dash) salt
1/2 c. coconut oil, room temp.
2 T. egg replacer diluted in 5 T. water
1/2 c. coconut "buttermilk" (1 1/2 t. white vinegar in a meas. cup, topped off to 1/2 c. w/ coconut milk)
2 T. coconut water (or coconut juice)
1 1/2 t. vanilla extract
1 T. almond extract
1 c. shredded, unsweetened coconut
Chocolate Glaze (see recipe below)

Preheat oven to 350 degrees.  Line standard muffin tin with silicone or paper liners, or grease and use without liners.  In stand mixer, fitted with paddle attachment, combine all dry ingredients and mix on low to blend.  Add coconut oil and beat on low until lumps are no longer visible.  Add diluted egg replacer and beat for 30 seconds.  Add coconut "buttermilk," coconut water/juice, and extracts and gradually increase speed to high to prevent splashing.  Mix for 1 1/2 min. or until smooth.  Scrape down bowl as necessary.  Fold in shredded coconut.  Using ice cream scoop or spoon, fill each prepared cup with batter.  Bake 20 min. or until cakes are set--test center for doneness because color will not be an indicator.  Remove from oven, let cool for a few minutes then transfer to cooling rack.  Let cool completely.  Glaze with Chocolate Glaze, sprinkle with a hint of sea salt and let rest so glaze can set.  Enjoy!

Chocolate Glaze
Ready for the savoring (or gobbling)
Makes 1 1/2 c.

This is the same recipe I used for the Very Vanilla Cupcakes I posted in early April though I call it a "glaze" here instead of frosting.  After some thought, I find this name more fitting.
1 c. vegan, soy-free chocolate chips
1/2 c. coconut oil (or grapeseed oil)
2 T. honey (or agave nectar)
1 T. vanilla extract
Pinch of sea salt
Additional sea salt, for decorating

In a medium saucepan over very low heat, melt chocolate with oil until smooth.  Stir in the honey, vanilla, and salt.  Place in the freezer 10-15 min. until cooled.  Remove and whip with a mixer until thick and fluffy, 1-2 min.  Spoon a very small amount of frosting over the top of each cake and spread gently so it doesn't go over the edge.  Carefully add more as needed.  (Alternatively, dip the cupcake tops in the glaze.)  Sprinkle with  just a bit of salt to complement the sweetness.  Store in a glass container, keeps a week or so.